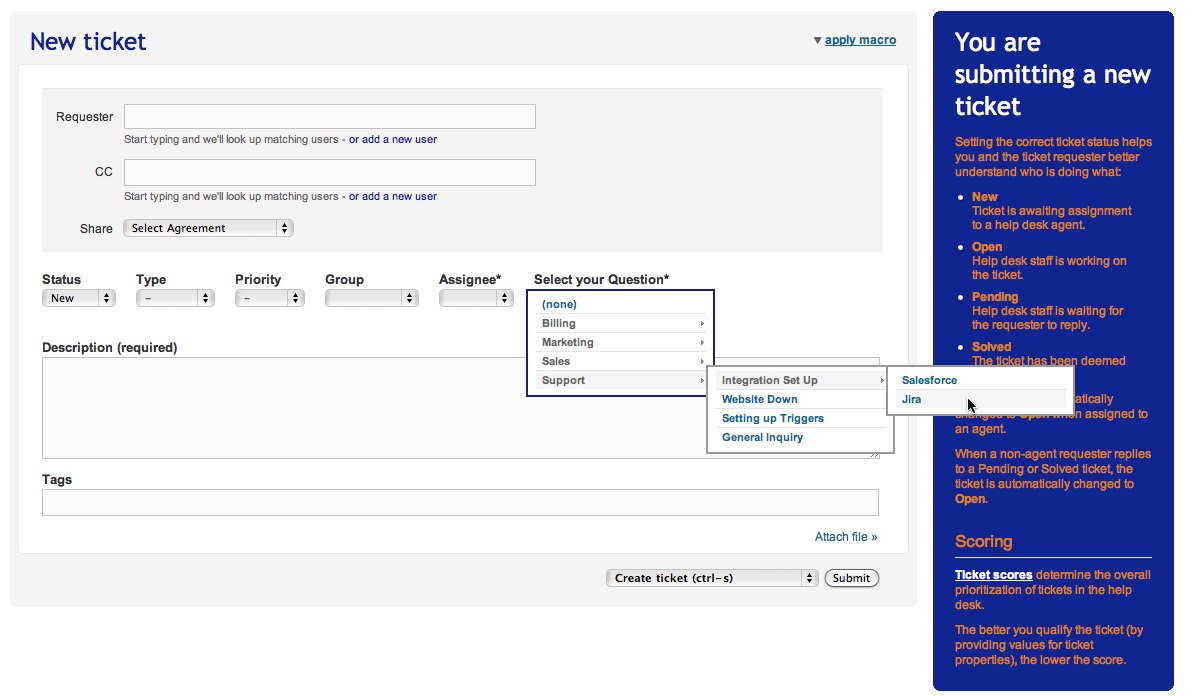
We recently had a customer who wanted their end users to be able to route tickets to very specific departments within the company. This would allow them to bypass their traditional support structure in order to get tickets directly to the appropriate department that could then answer a question as soon as it was submitted. Being able to do this would greatly increase their help desks efficiency.
But they wanted to accomplish this without using several different drop-down menus. They reached out to us to find a third-party contractor that might build this functionality into their Zendesk.
So imagine how pleased they were to discover there was no need to hire any third-party contractor; that what they wanted to do could easily be accomplished with the basic functionality of Zendesk, available on all plans.
All it takes is nesting the custom field options of a drop-down list.
Nesting fields are easy enough to set up. Select Manage > Ticket Fields and create a new drop-down field. You can add the levels that you want, in the Title text box, separated by ::. A tag will be automatically be assigned to the title – you can refer to these tags when you are setting up Triggers, Automations or setting up Views or Reports.
Here is an example of how you can organize your nested fields:
From here, you can select Update field and go into a new Ticket to test the functionality. It should look something like this:
And voila! youve just created a custom field that packs quite a punch.
Feel free to get creative – you can also use these for Agent only purposes as well to drill deeper into the content of your tickets. There are tons of possibilities with Zendesk nested fields.


